PACKING UP THE HOUSE TO MOVE
STEP 1 – Visualizing And Staying Focused
Before one starts and all through the packing process one can use visualization to guide them. This can be especially helpful when one gets stuck and does not know where to begin, continue or end a project. Visualization helps us to see clearly what needs to be done. Starting the visualization process: Visualization for this type of project usually takes about 3-10 minutes.
- Lie comfortably on a couch, bed or recliner.
- Visualize all the different rooms in the house. (It might be helpful to cover one’s eye’s while visualizing).
- Visualize the different parts of each room and what would need to be packed at the stage one, is up to.
- A person can easily get overwhelmed if they look at the whole picture. Therefore it is important to stay focused on each individual task or section.
For instance, instead of thinking, “How in the world am I going to pack up this whole house?” One must look at the different tasks or sections that need to be tackled within each room. For example; the bookcases are one task, the toys are another task and each set of drawers and closet is another separate task on its own. The only question is, which task to do first, second, third, etc. This is where visualization can help us.
- Note that visualization can also be helpful in guiding us in situations with one’s spouse, children, workplace and other factors in life.
Do not get discouraged if the visualization does not work for you, as it does not work for everyone.
STEP 2 – The Equipment One Will Need
- House clothes
Clothes that we wear while we are packing generally tend to get ruined. Therefore it is a good idea to clean wearing old worn cloth.
- Permanent marker
Black is usually the best color to use.
- Packing tape
The clear packing tape is usually stronger and it also has a neater look.
- Newspapers, bubble wrap or different size towels (to wrap breakable items).
Because towels are constantly in use one might need to use newspapers instead when packing in the beginning. Towels can be used on breakables that are being packed the last few days before the move.
- A variety of different size boxes
- One can get empty boxes from supermarkets.
- Light stuff like blankets should be packed in bigger boxes, while heavy stuff like s’farim/books should be packed in smaller boxes so that the boxes will not be too heavy to carry. (The size of grape juice or wine boxes are usually the right size for s’farim/books).
- All boxes should be packed to capacity. Therefore one wants to make sure the right size boxes are being used so that it will not be too heavy for the movers to lift.
STEP 3 – SECURING AND SEALING THE BOXES
- When taping up boxes, use three strips lengthwise and three strips width wise, both on the bottom and top of each box. This is to ensure that the box will be strong and not tear apart. The bottom of the box gets taped up before one starts putting in items.
- To close the bottom or the top of the box,
- line up and hold the flaps together. Then tape up the middle section first across the width.
- Then tape the box half way towards the right and half way towards the left side of the box.
- Do the same lengthwise, first tape the middle then half way toward the right and half way toward the left.
- When taping or sealing the boxes,
- Open the packing tape a little. Stick the packing tape overlapping the side of the box by about four to five inches.
- Slowly bring it to the other end of the box overlapping to the side (by about four to five inches).
- Cut the packing tape only after you have brought it across from one side to the other. (This is better than cutting a long strip of tape at once).
- Fold the edge of the roll of tape over to help one find the beginning of the tape the next time one will need to use it.
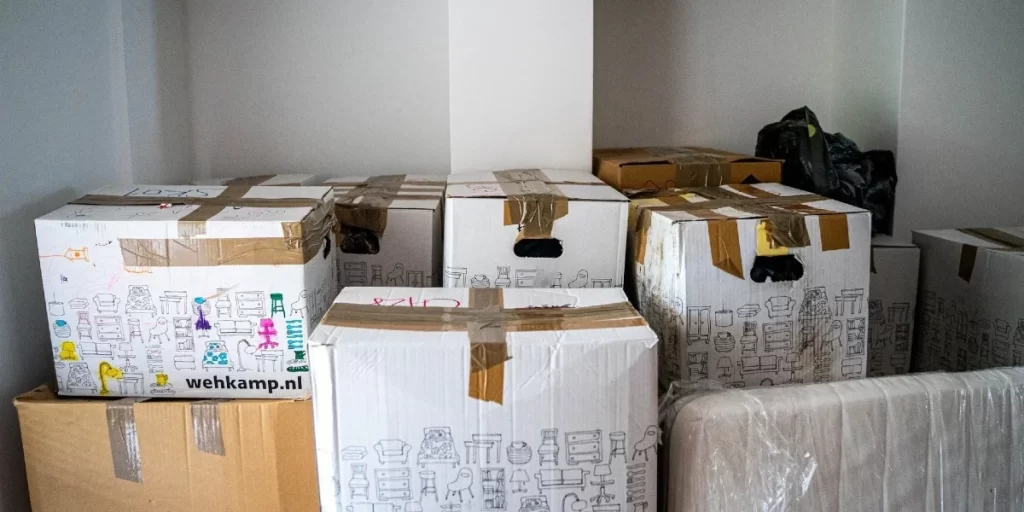
- Labeling the boxes before sealing
- Before sealing each box, write In large clear letters on all four sides of the box the contents inside and in which room you would like the box to go into in the new place.
- (If one cannot write on the box, due to that, the boxes will need to be returned. Take regular size paper and cut in half, label the contents that are in the box and then tape to the box).
- Write on the boxes “bedroom 1, 2, 3, kitchen, living room” etc. This is so that the movers will know where each box belongs.
- If possible, put all the sealed boxes together into one room. If one has a house with more than one floor, one can pick a room on each floor in which to put all the sealed boxes.
- Before moving into the new house, one should put signs on the bedroom doors of the new house, “Bedroom 1, 2, 3 etc”.
STEP 4 – Starting To Pack
It is best to start tackling these areas soon after one has found out that they would need to move.
Start with items that are not used day-to-day. As moving day comes closer, one will continue to pack things that they will be able to manage without. One can continue every day until the day of the move. For instance:
- Start packing all of the s’farim/books that are not in use and will not be needed before the move. Then one should put all the s’farim/books that are left on one shelf so that the room looks nice and neat.
- Next, pack all the clothing that is in storage (summer/winter, blankets etc). Bulky items like winter coats might be easier to take off the hangers and put into a big box.
- Then pack away most of the children’s toys. Leave a few main games and toys that the children like.
- Take pictures off the walls, wrap them up in newspapers and pack. They should be piled one on top of each other or side by side from largest to smallest.
STEP 5 – Basement, Storage room, Garage
- Basements, storage rooms and garages can be extremely difficult and tedious to tackle. Remember to use visualization and focus on sections.
- Pack up items that are not in use and are unlikely to be used before the move.
- Always keep out general tools like a hammer and screwdrivers.
- If any of these areas are disorganized, see article “A Guide To A Daily Household Routine” sections 28-32.
STEP 6 – Items That Are Used Day To Day
Start tackling these areas about two weeks before the move. One should use their judgment and visualize in which order things should be packed.
- These items include the day to day clothing we wear, the kitchen and the drawers and cabinets in the bathroom.
- One should not forget about the laundry room. Check if there are any items that need to be packed.
- Hanging clothes (together with the hanger) can simply be folded in half and be packed into a box.
- Gather any remaining odds and ends together in one room. Sort through them and throw away the garbage. Everything else, pack away together in one box. (Label the box “odds and ends” and indicate which room it will go into in the new house).
STEP 7 – Kitchen
Boxes that were filled with kitchen items should be kept in the living room.
- Pantry
- Try to use as much as possible as soon as one knows they are moving. Don’t stock on up on any more food.
- After one packs up the pantry, label the box/es “Kitchen/Pantry”.
- Refrigerator/Freezer
- In the weeks leading up to the move, try to use up the food in the refrigerator and freezer and avoid accumulating unnecessarily.
- Packing pots and dishes
- Those with separate dairy and meat dishes should pack them in different boxes.
- Pack to capacity – Make sure there is no room to put anything else in the box.
- Pack solid – Put items inside other items. For example:
- A big pot might go over large plates. Pots will go inside one another but if there is space in between some pots, one can put small plates in between the pots. Strainers, bowls and containers can also go in between pots if they fit.
- Silverware – below are two suggestions on packing silverware
- The silverware can be left in the cutlery divider, covered with a cardboard and taped up.
- Wrap up the silverware in a thin towel. Put the silverware into a plastic bag and then put it into a box in between other items.
Breakable dishes should be wrapped up well, either in towels or bubble wrap.
- Under the sink
- Pack anything that will not be needed before the move. If there is still room in the box, keep it open until the moving day gets closer and add more to the box.
STEP 8 – A day or two before the move
The only things that should remain in the bedrooms are:
- The clothing that will be worn for the next two days.
- A bath towel for each member of the family.
- The furniture.
- Sealed boxes.
- Anything else that you think you will need at this time.
The only thing that should remain in the kitchen are:
- The amount of food that will be needed until the move.
- Anything else you think you will need.
STEP 9 – MOVING DAY
- On the morning of the moving day, strip the beds and put the linen together into one box.
- Put all the food from the refrigerator in bags and then into a box. Label the bag and box “Refrigerator/Freezer.” (One may want to take the perishable items with them rather than sending them with the movers).
- Systematically, go through each room and bathroom in the house and check to see that everything is empty and clean. (If possible, it is advisable to do most of the cleaning a day or two before the move).
- Check:
- Closets
- Drawers
- Under the beds
- Behind the doors
- Cabinets
- Pantry
- Refrigerate, freezer
- Under the sink
- Bathtub/shower
- Bathrooms
10 – GENERAL TIPS AND ADVICE
- All through the packing process, keep the house as organized and clean as possible.
- The last few days or week before the moving day make very simple meals.
- When one moves from one apartment to another, it is only proper to leave the old apartment as clean as possible. Anything that is not needed one should either give it to others who can use it or throw it away.
- Leave a broom, dustpan, rags and one or two cleaning detergents in the house if one will need to stay around to clean after the movers have left.
- It is best to focus on the packing rather than sorting out what one needs or wants to get rid of.
- In the new house there should be someone guiding the movers as to which rooms the boxes belong. However the person only needs to guide the movers until they get the hang of it.
TABLE OF CONTENTS
STEP 1 – Visualizing And Staying Focused
STEP 2 – The Equipment One Will Need
STEP 3 – Securing And Sealing The Boxes
STEP 4 – Starting To Pack
STEP 5 – Basement, Storage Room, Garage
STEP 6 – Items That Are Used Day To Day
STEP 7 – Kitchen
STEP 8 – A Day Or Two Before The Move
STEP 9 – Moving Day
10 – General Tips And Advice
Comments